Mom’s Best Buttermilk Biscuits
Directions
And the Secret Ingredient in this Classic is… Lard (Of Course)
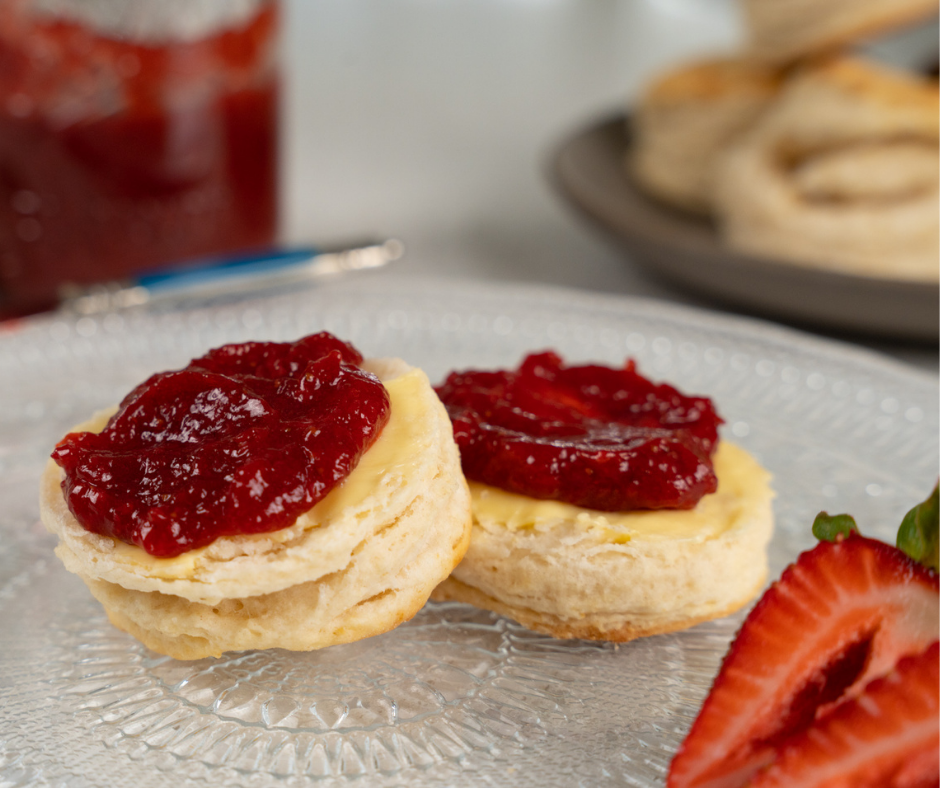
How about greeting this Mother’s Day with biscuits and preserves just like mom used to make –- although in this case, dad or the kids can do the actual prep honors?
The latest recipe from Greg Hozinsky, Coast Packing Company’s Corporate Chef, is certain to delight everyone in the house. Here are step-by-step instructions for homemade meltables, topped off by your own fresh strawberry preserves.
Mom’s Best Buttermilk Biscuits
Makes 10-12 biscuits
This recipe is simple and quick to make. The key to making a good biscuit is not to overwork the dough; you want to work it as little as possible to get that great flaky and crumbly texture. That’s why lard makes the best pie crust and biscuits: lard contains much less moisture than butter. Moisture, when added to flour, develops gluten, leaving your breads and pastries chewy. In my opinion, these biscuits are best enjoyed fresh, so if you’re making your own preserves, do so at least a day before you make the biscuits.
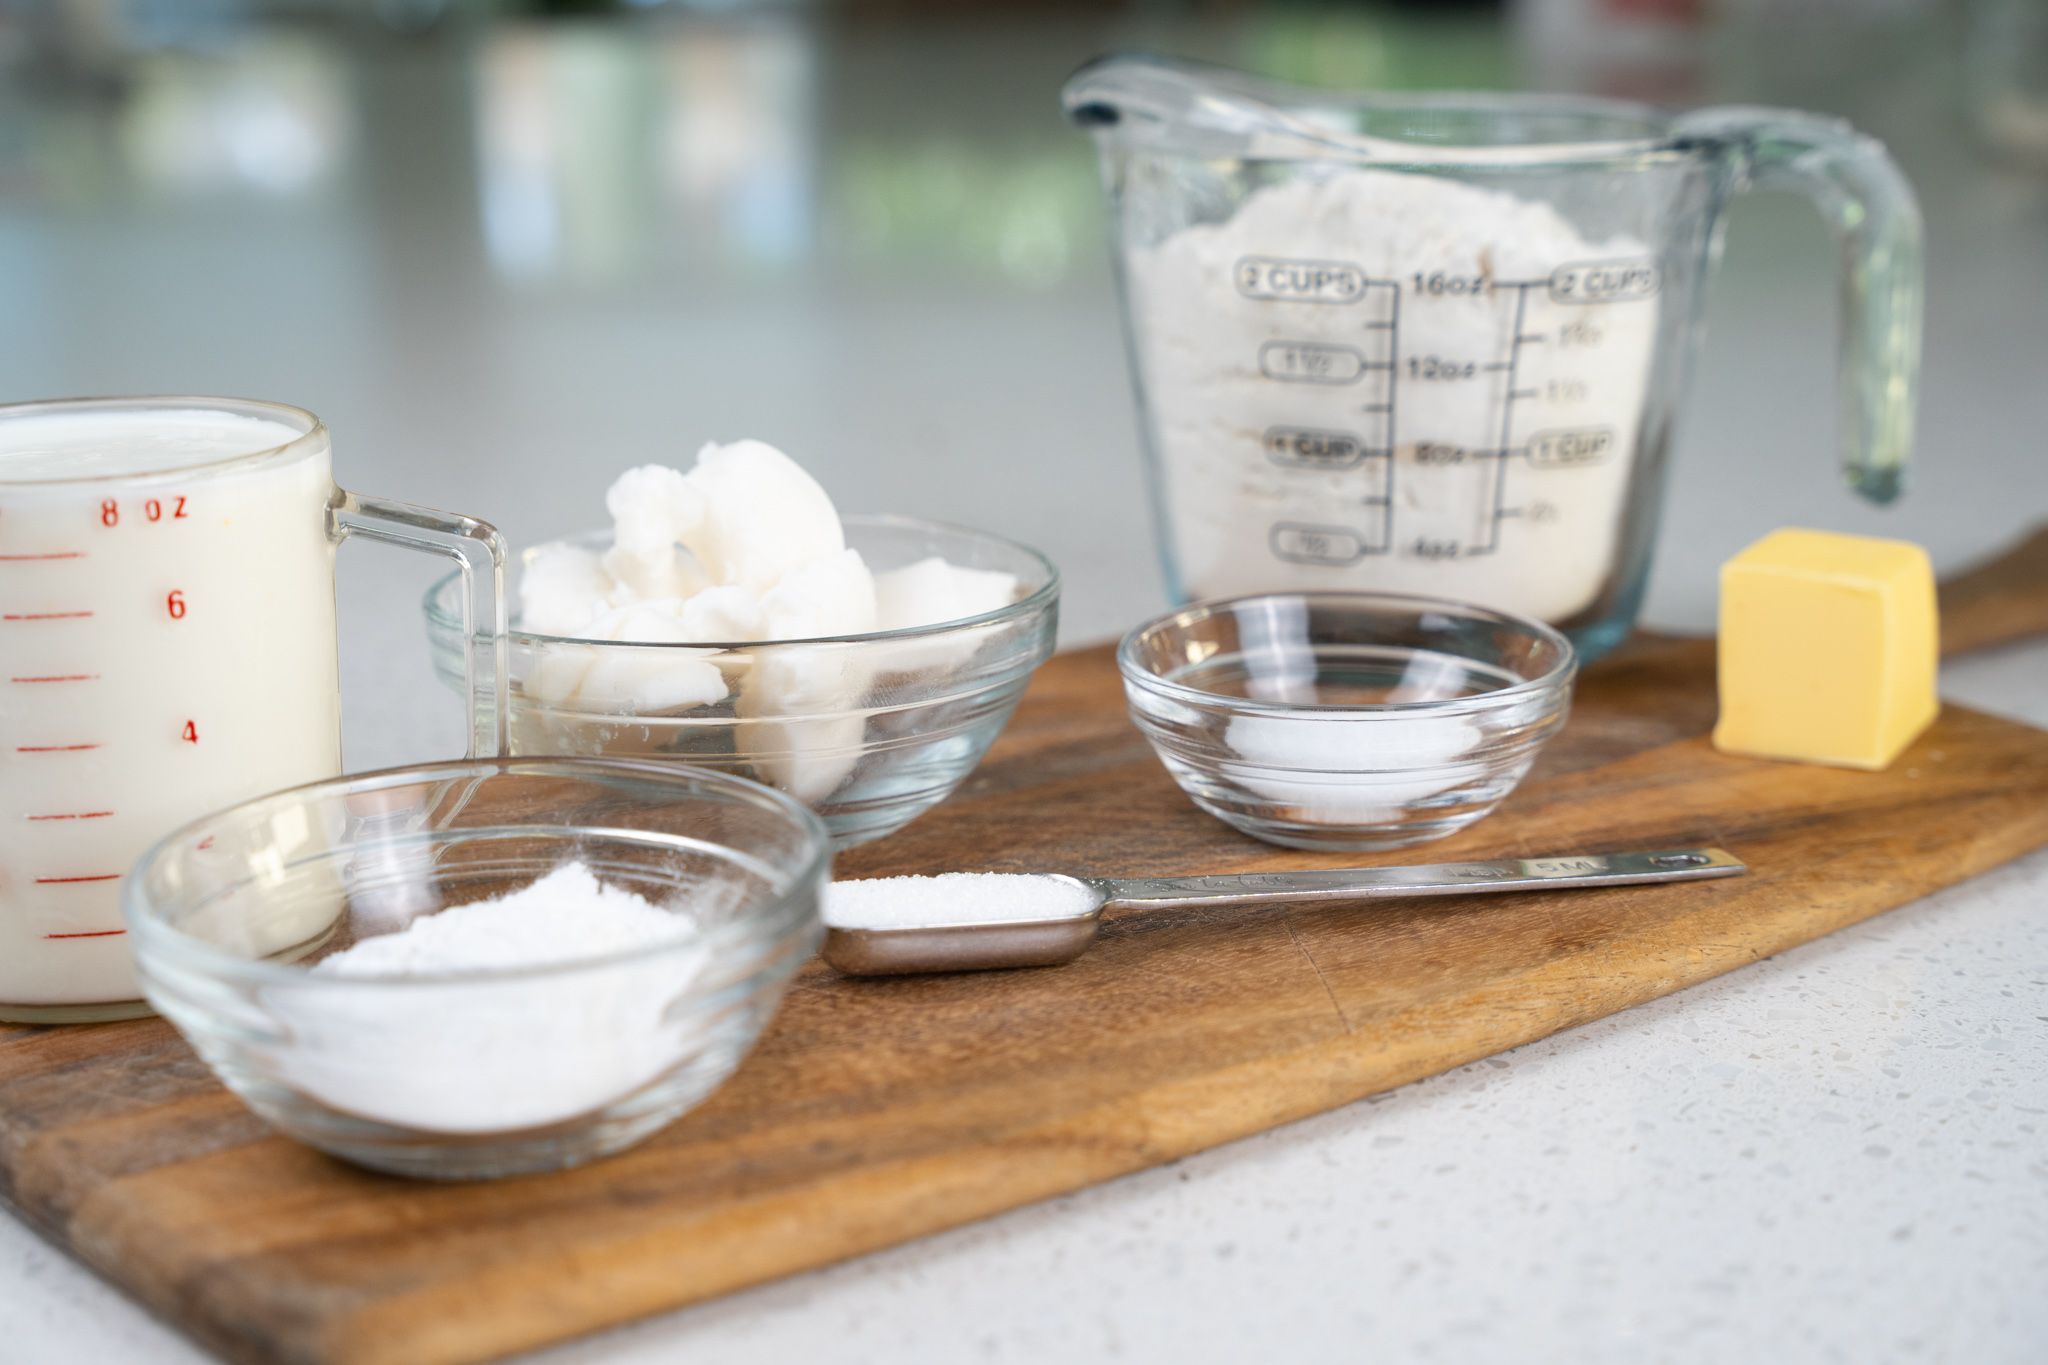
Ingredients
- 2 cups high quality AP flour, plus a little extra for dusting.
- 2 tablespoons baking powder
- 1 ¼ teaspoons salt
- 1 teaspoon sugar
- 6 tablespoons pork lard, very cold
- 1 cup buttermilk
Directions
- Preheat convection oven to 425 degrees
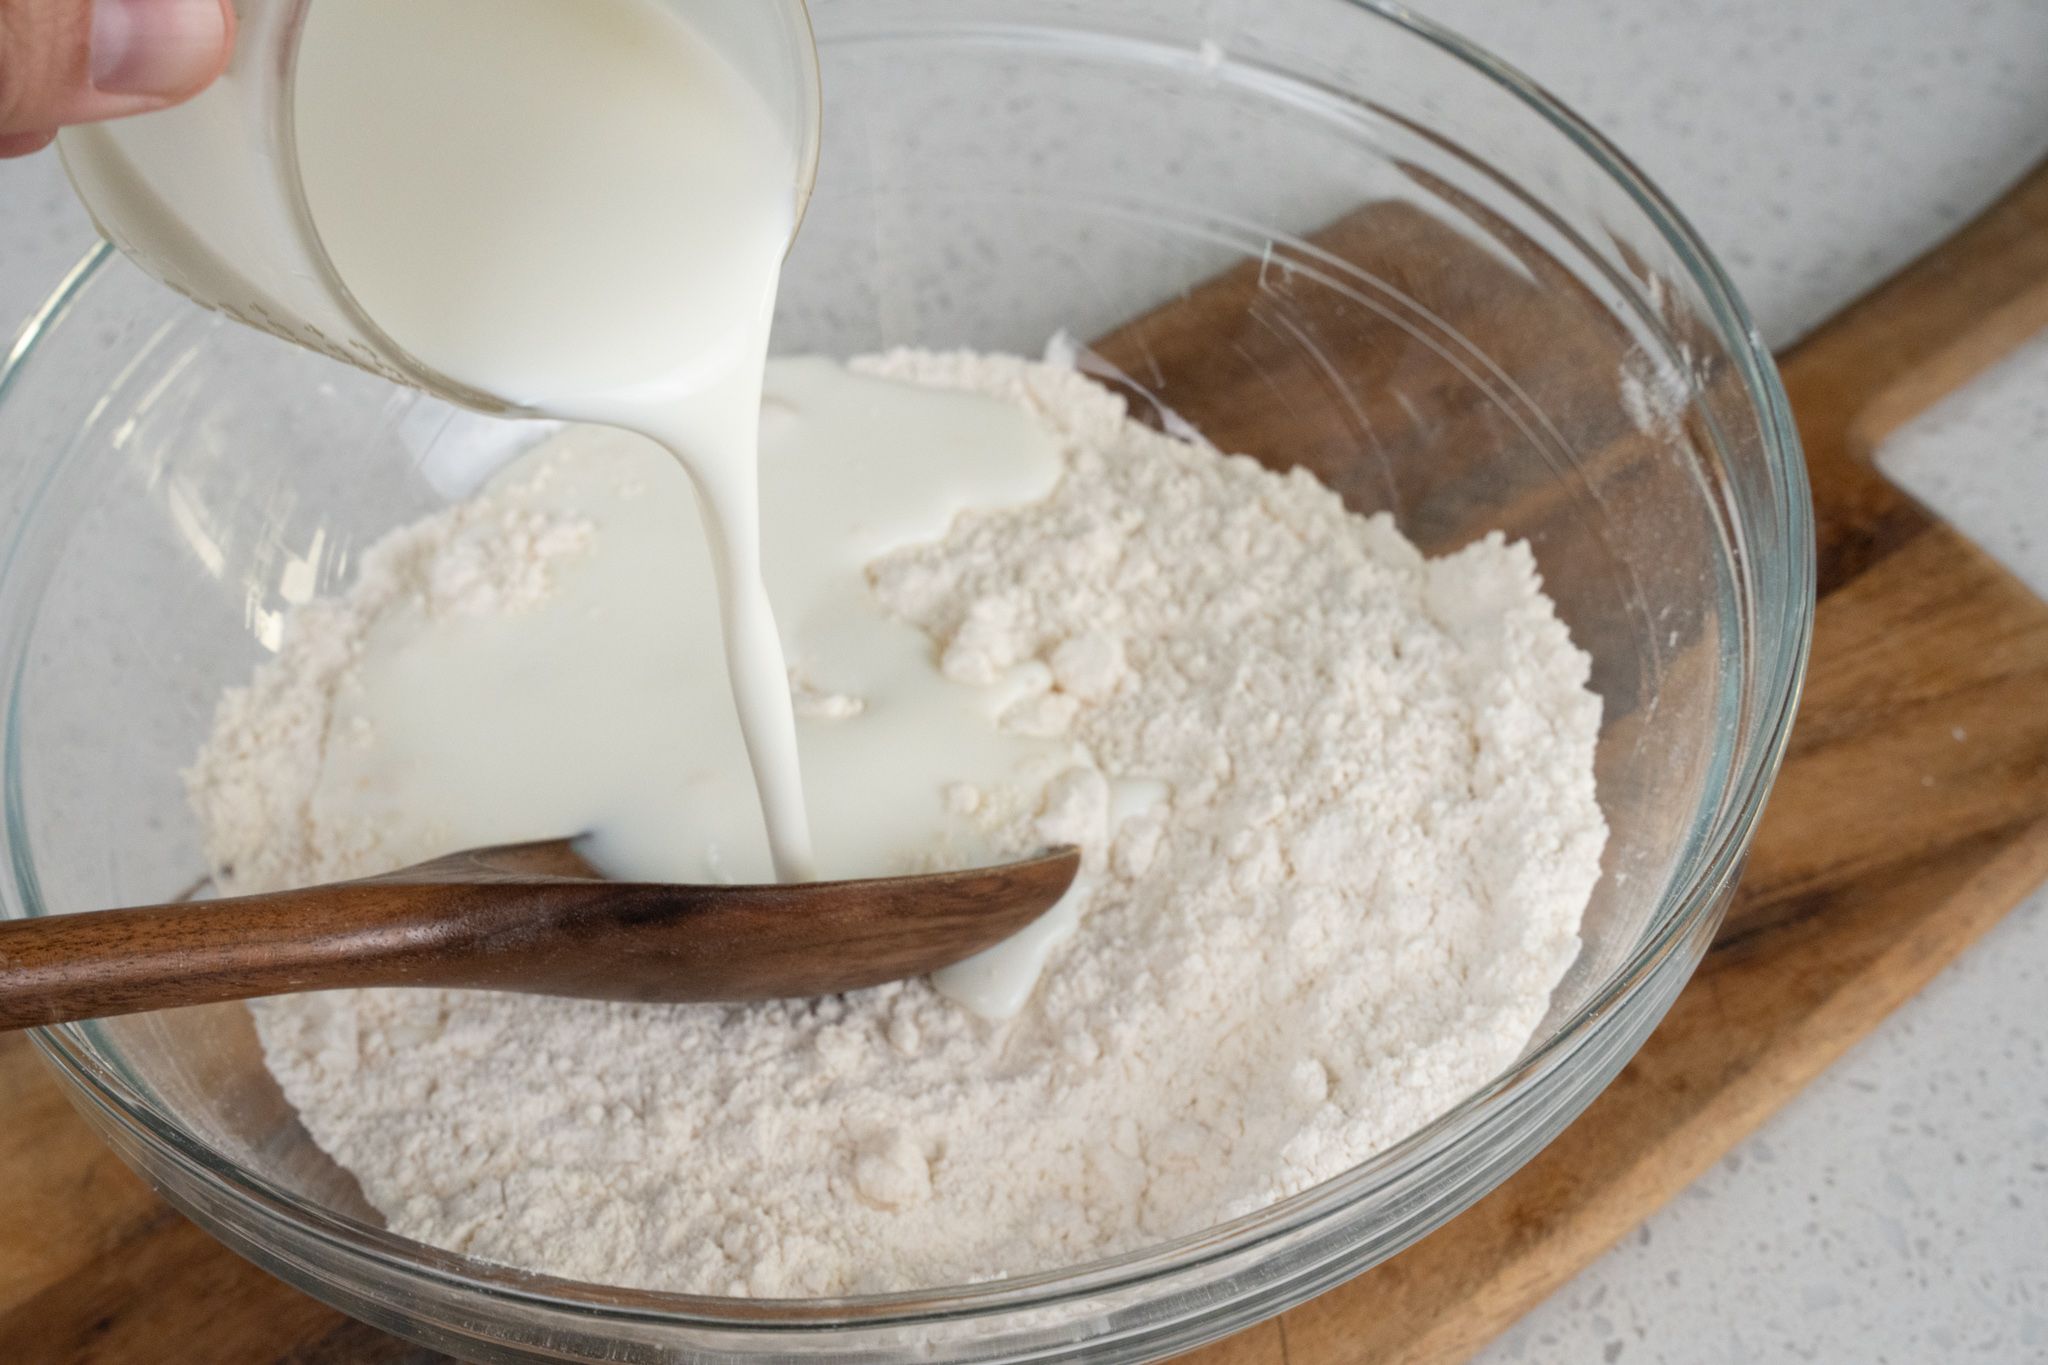
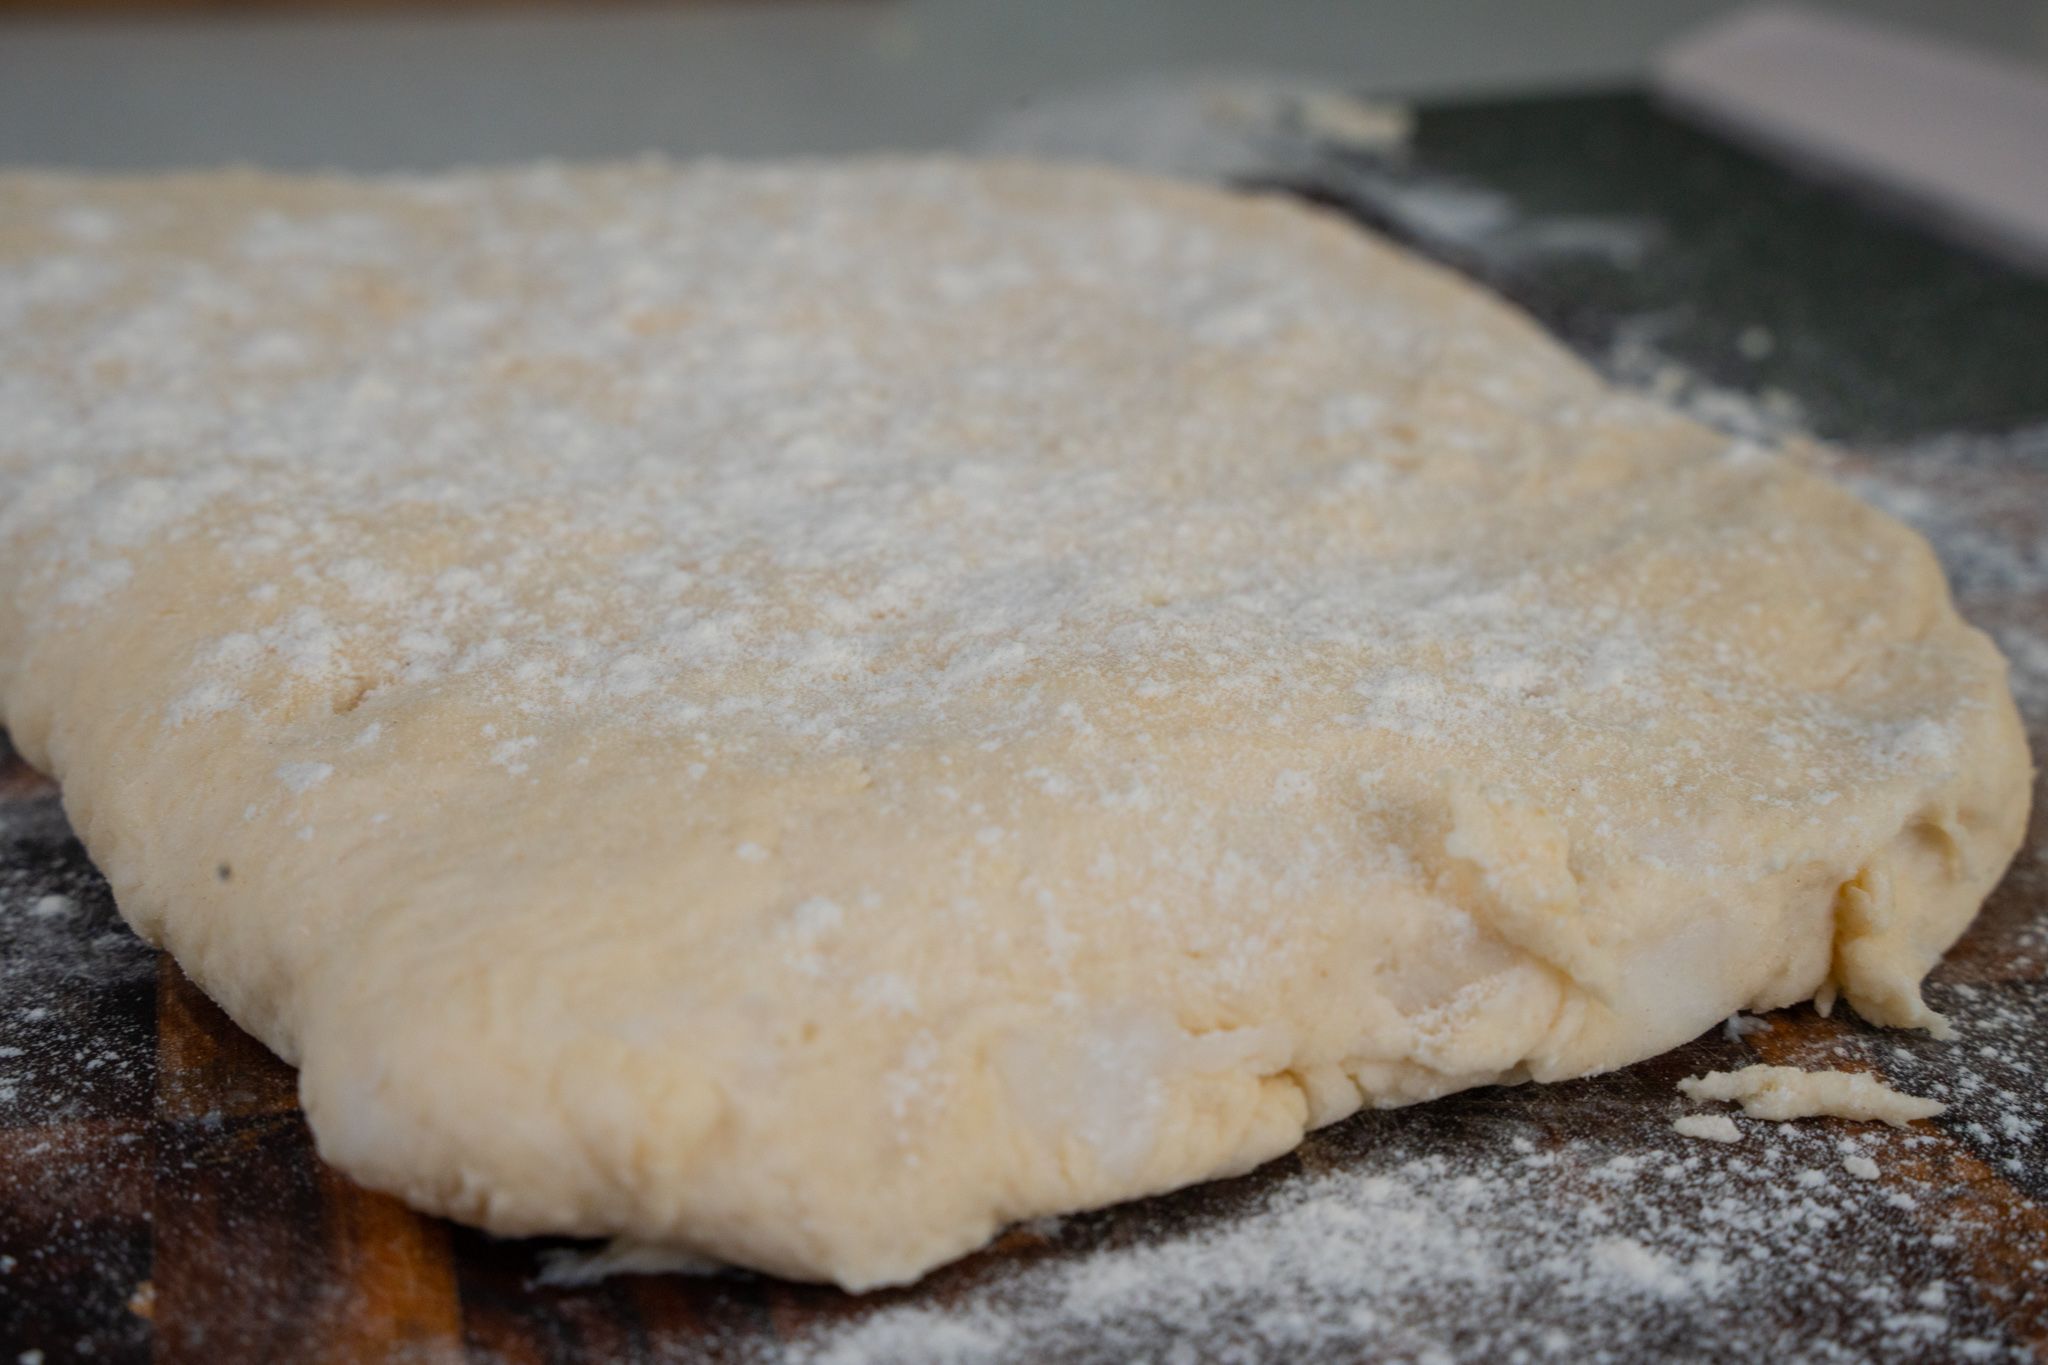
- Mix all the dry ingredients together in a large bowl. Add in lard and use a pastry blender/cutter (you can also do this with two forks). The texture should be crumbly with pea- to bean-size clumps visible. Make sure not to overwork the fat into the flour mixture. A good-size crumb equals and flaky crumbly biscuit.
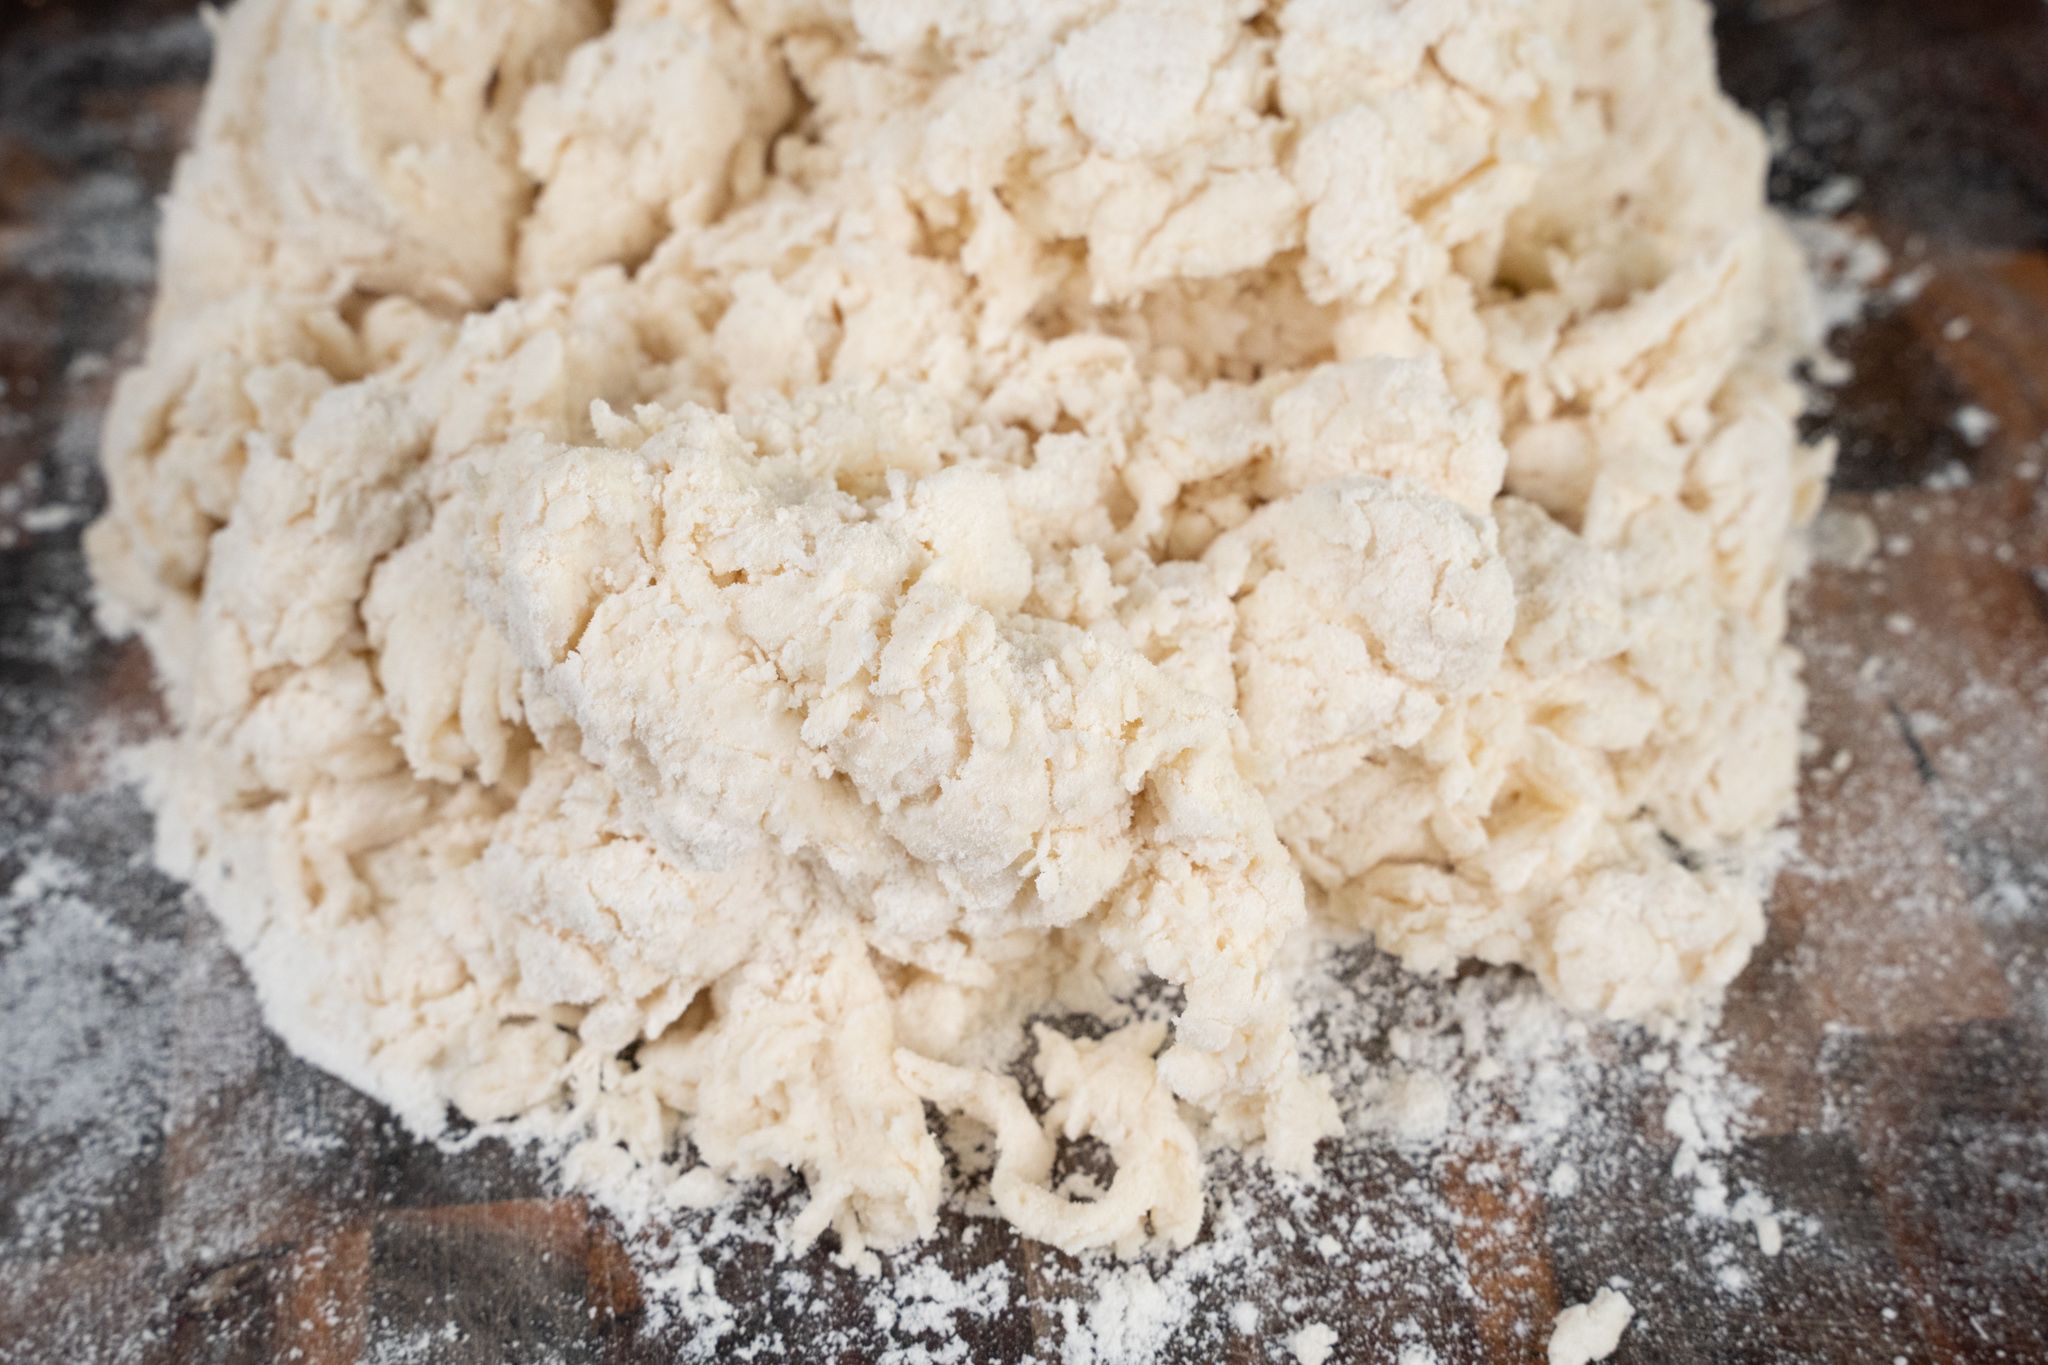
- Using a wooden spoon, stir buttermilk into flour and lard mixture. Stir just enough to start pulling the dough together; again, you really do not want to overwork it. Transfer onto a clean, lightly floured surface.
- Use your hands (a little flour rubbed into your hands will help keep the dough from sticking) to form the dough together; press the dough down until it is about ½ thick. Make the dough over onto itself, flatten out again to 1/2 inch thick and repeat this process for a a a total of 5 folds. This step will give the biscuit that great flaky, layered texture (don’t be afraid to add a little extra dusting flour when needed, to prevent sticking).
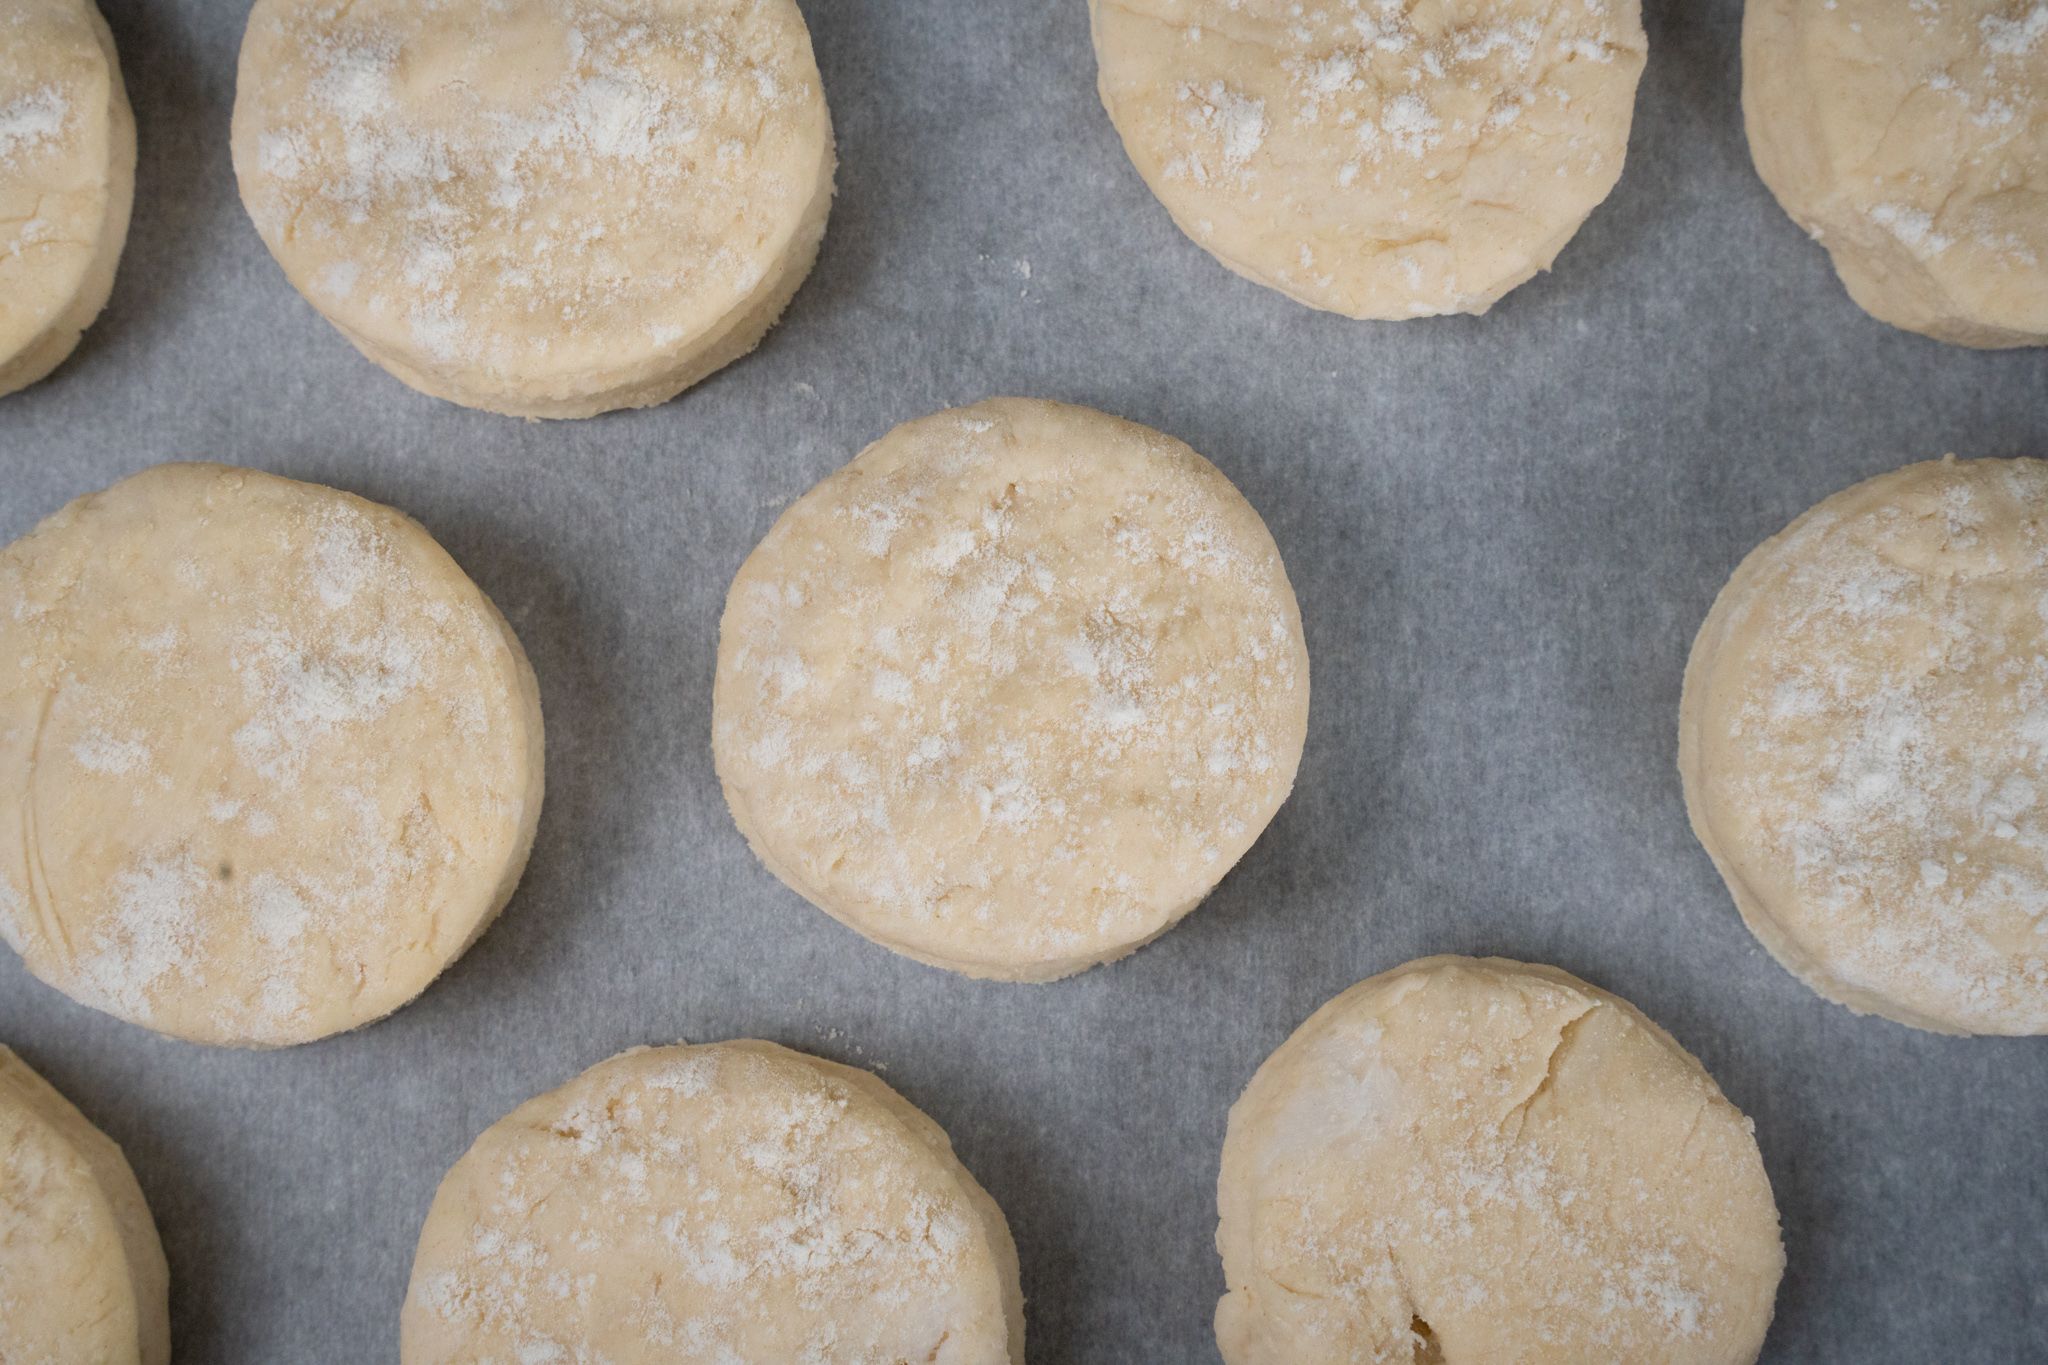
- After your final fold, press the dough out with your hands again, but this time to 1-inch thickness. Using a biscuit or round cutter that is about 2 ½ inches in diameter, cut out your biscuits and transfer to a nonstick baking dish. Use the leftover dough, re-form and continue to cut out the dough until all your biscuits are formed.
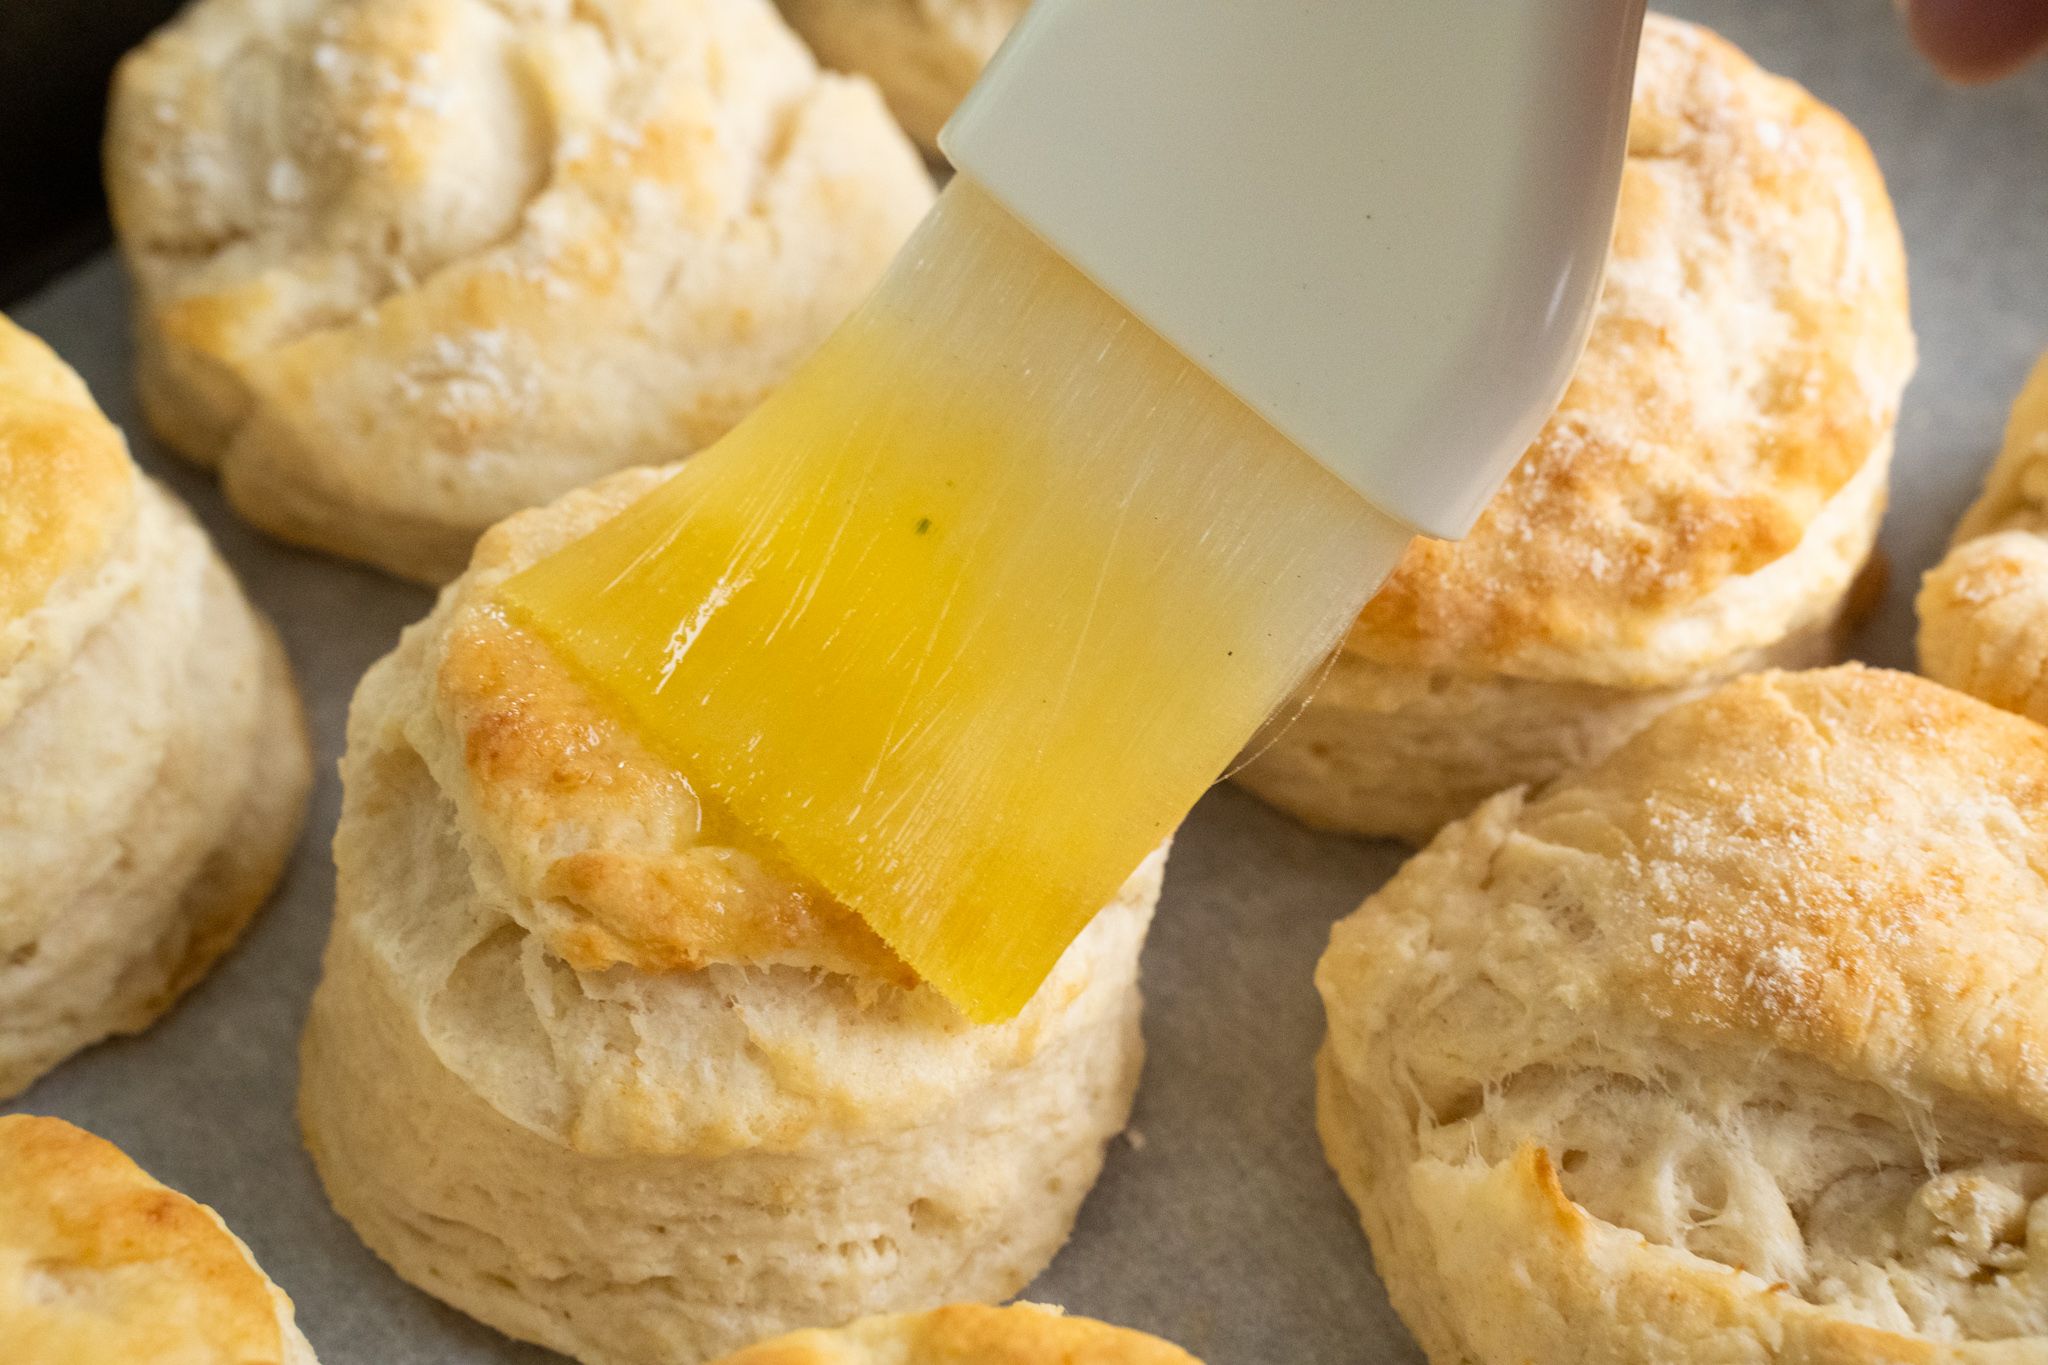
- Bake in the middle of the oven for 12-14 minutes or until light golden brown.
- When biscuits come out of the oven, immediately brush the top with a little melted butter; this step is optional but worth doing!
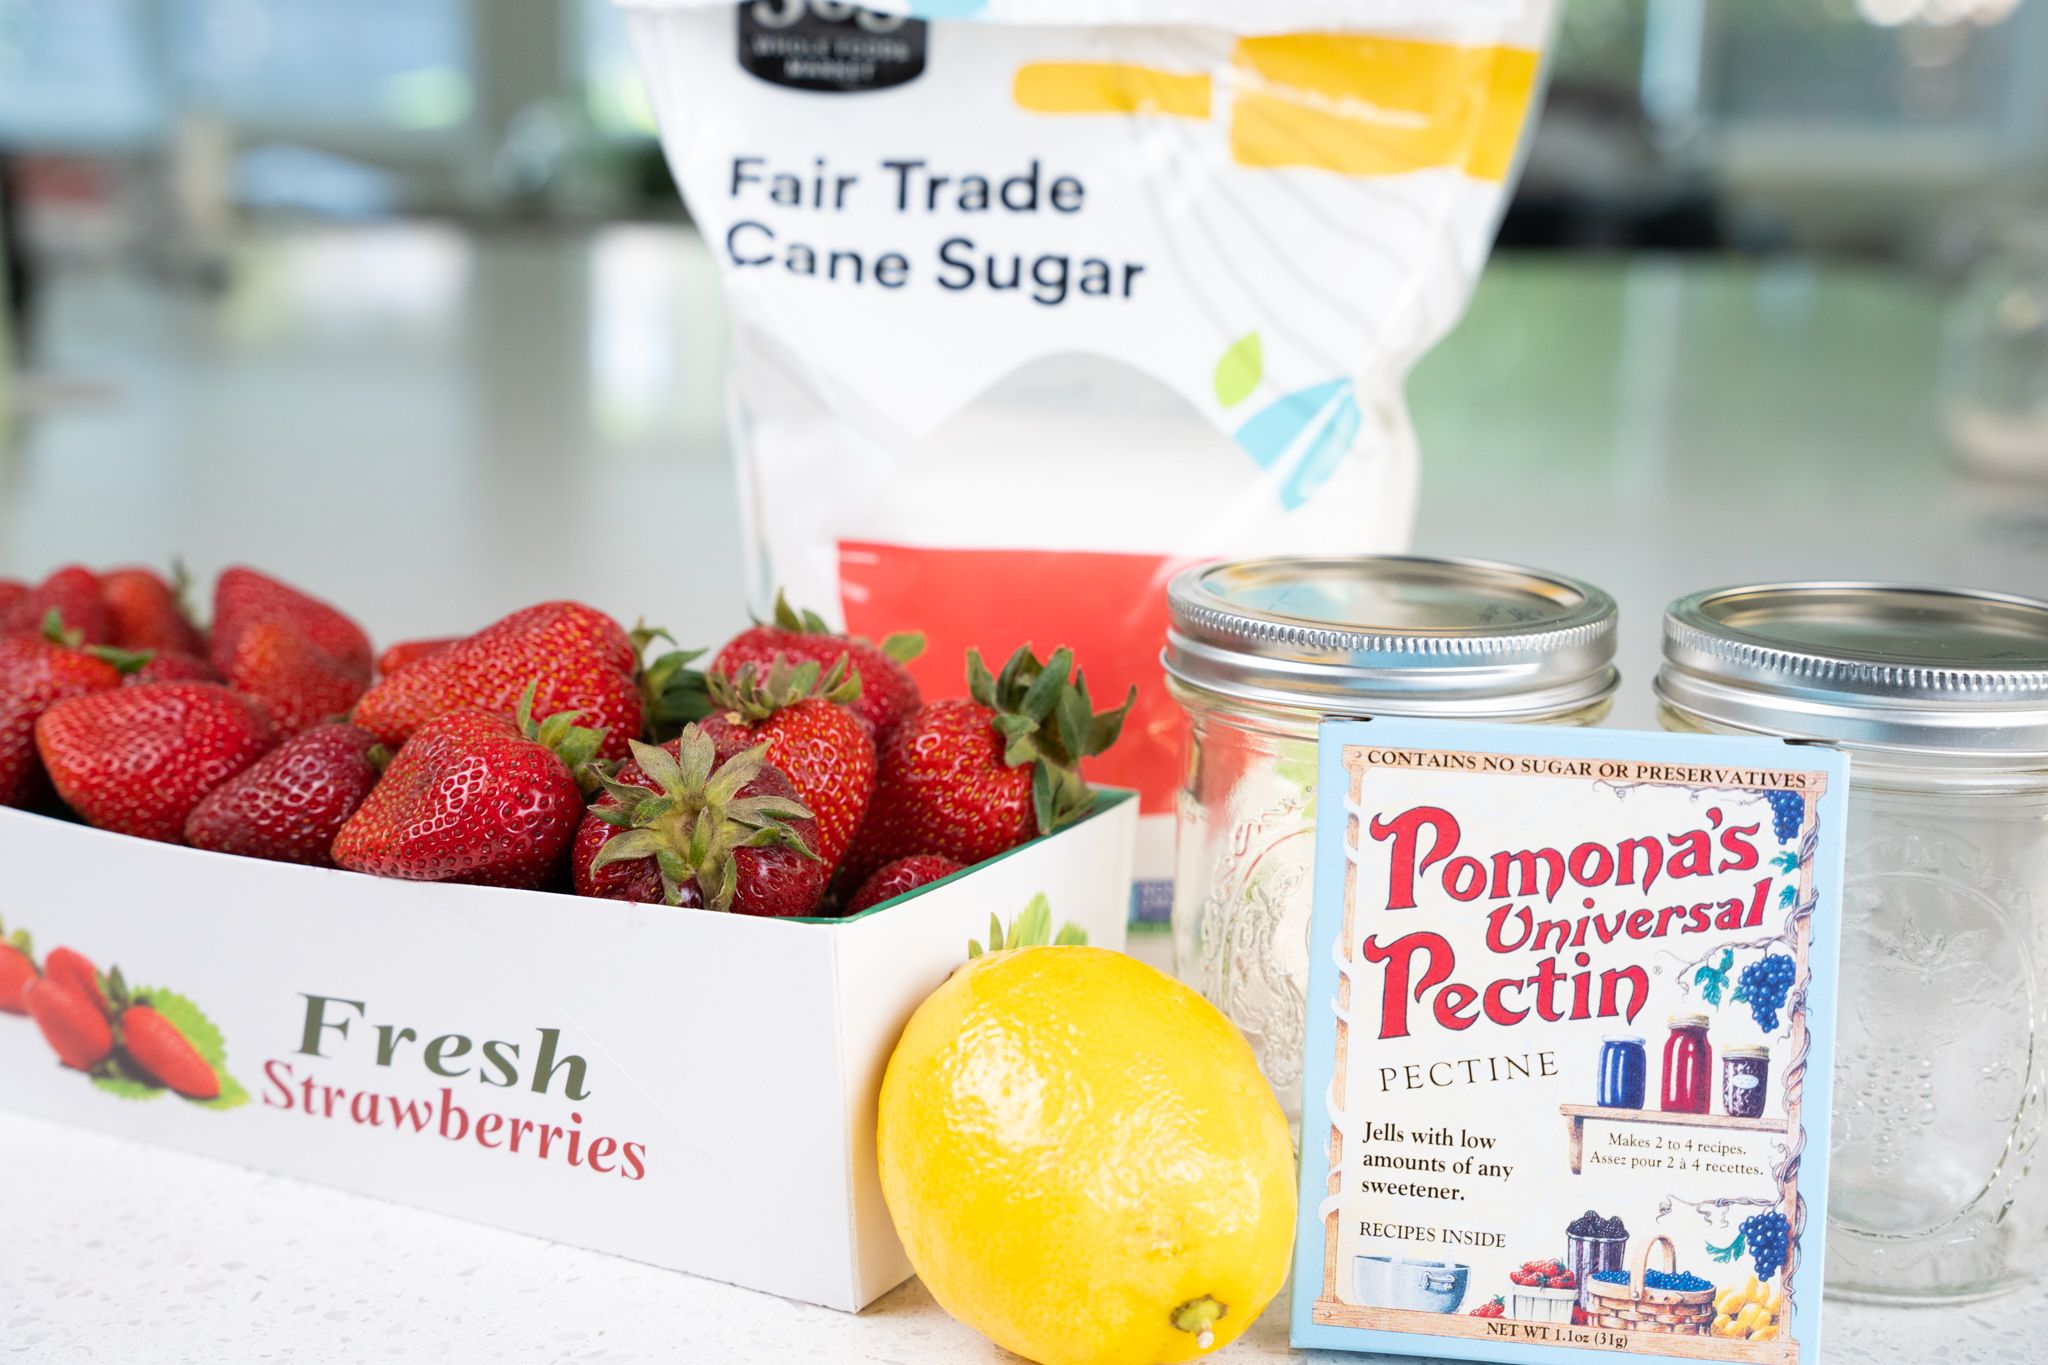
Fresh Strawberry Preserves
Makes about 4-5 cups
For this recipe, it’s all about starting with great strawberries. If you have a nearby farmers market, I highly recommend getting your strawberries there – they’re likely to be much than anything you’ll find in a grocery store. This recipe also calls for a lot less sugar than most recipes. I like the flavor of the strawberries to really shine, so getting robust, naturally sweet strawberries is key.
Ingredients
- 3 pounds ripe fresh strawberries
- 2 tablespoons fresh lemon juice
- 1 ¼ cups sugar
- 2 tablespoons of pectin
- 1 tablespoon water
Directions
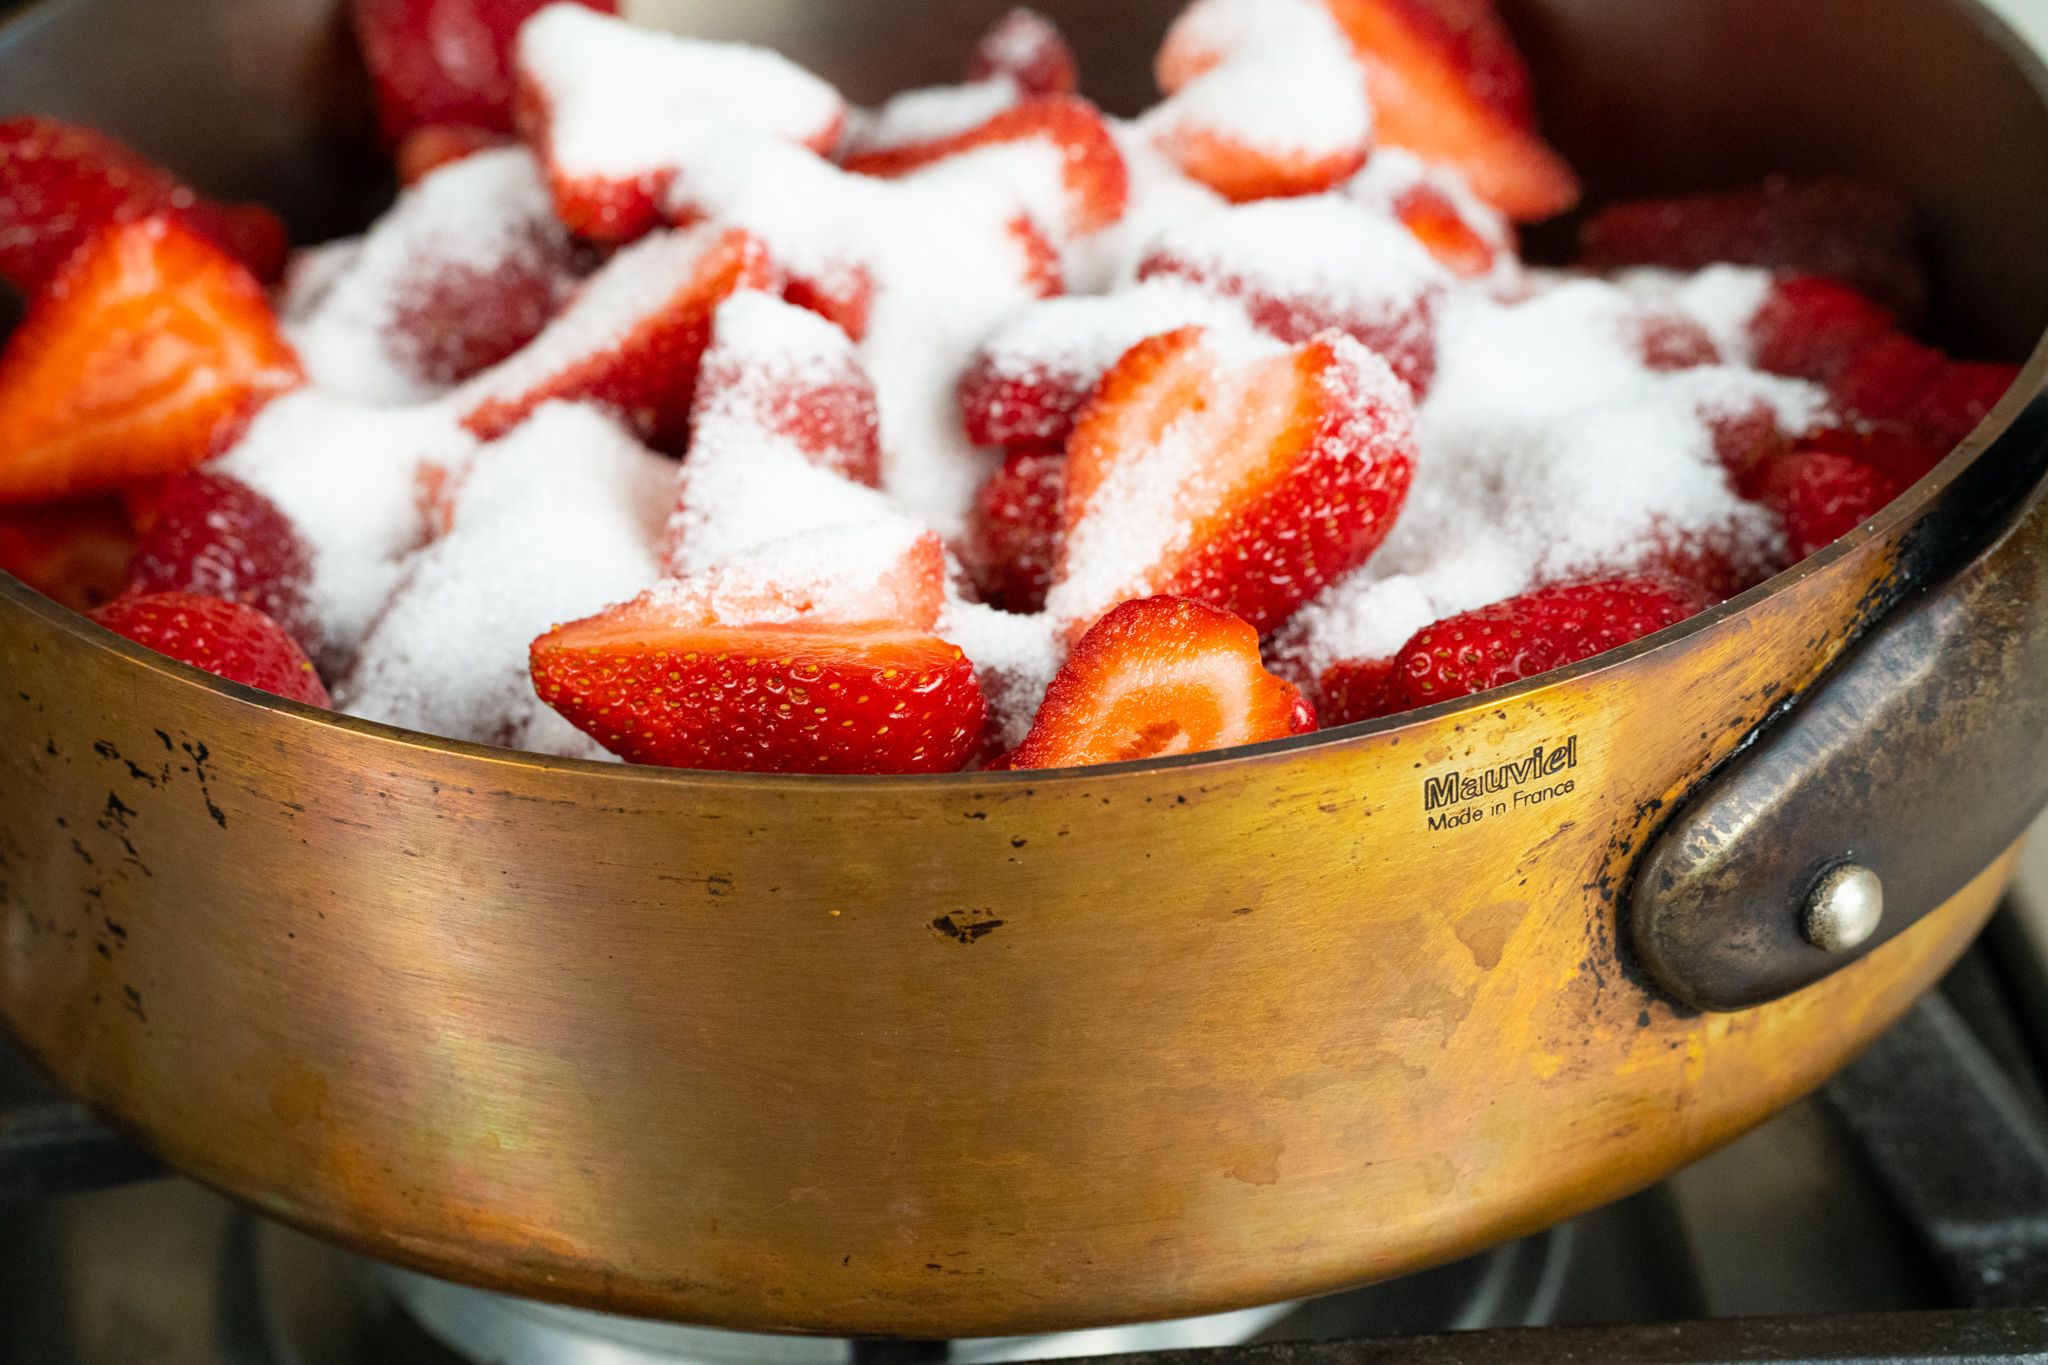
- Wash your strawberries and remove the husk. Cut strawberries in half or, if very large, quarters. Place strawberries into a medium-size pot with lemon juice, ½ cup sugar and tablespoon of water; return to medium heat until the strawberries release all their juices, then turn down to a rolling simmer.
- For this recipe, I use a universal citrus pectin (it’s what was available at my local grocery store), so it called for 2 teaspoons of water mixed with calcium powder; if you’re using the same pectin, add the mixture to the strawberries at this time. Just follow the recommended instructions on whatever pectin you are using.
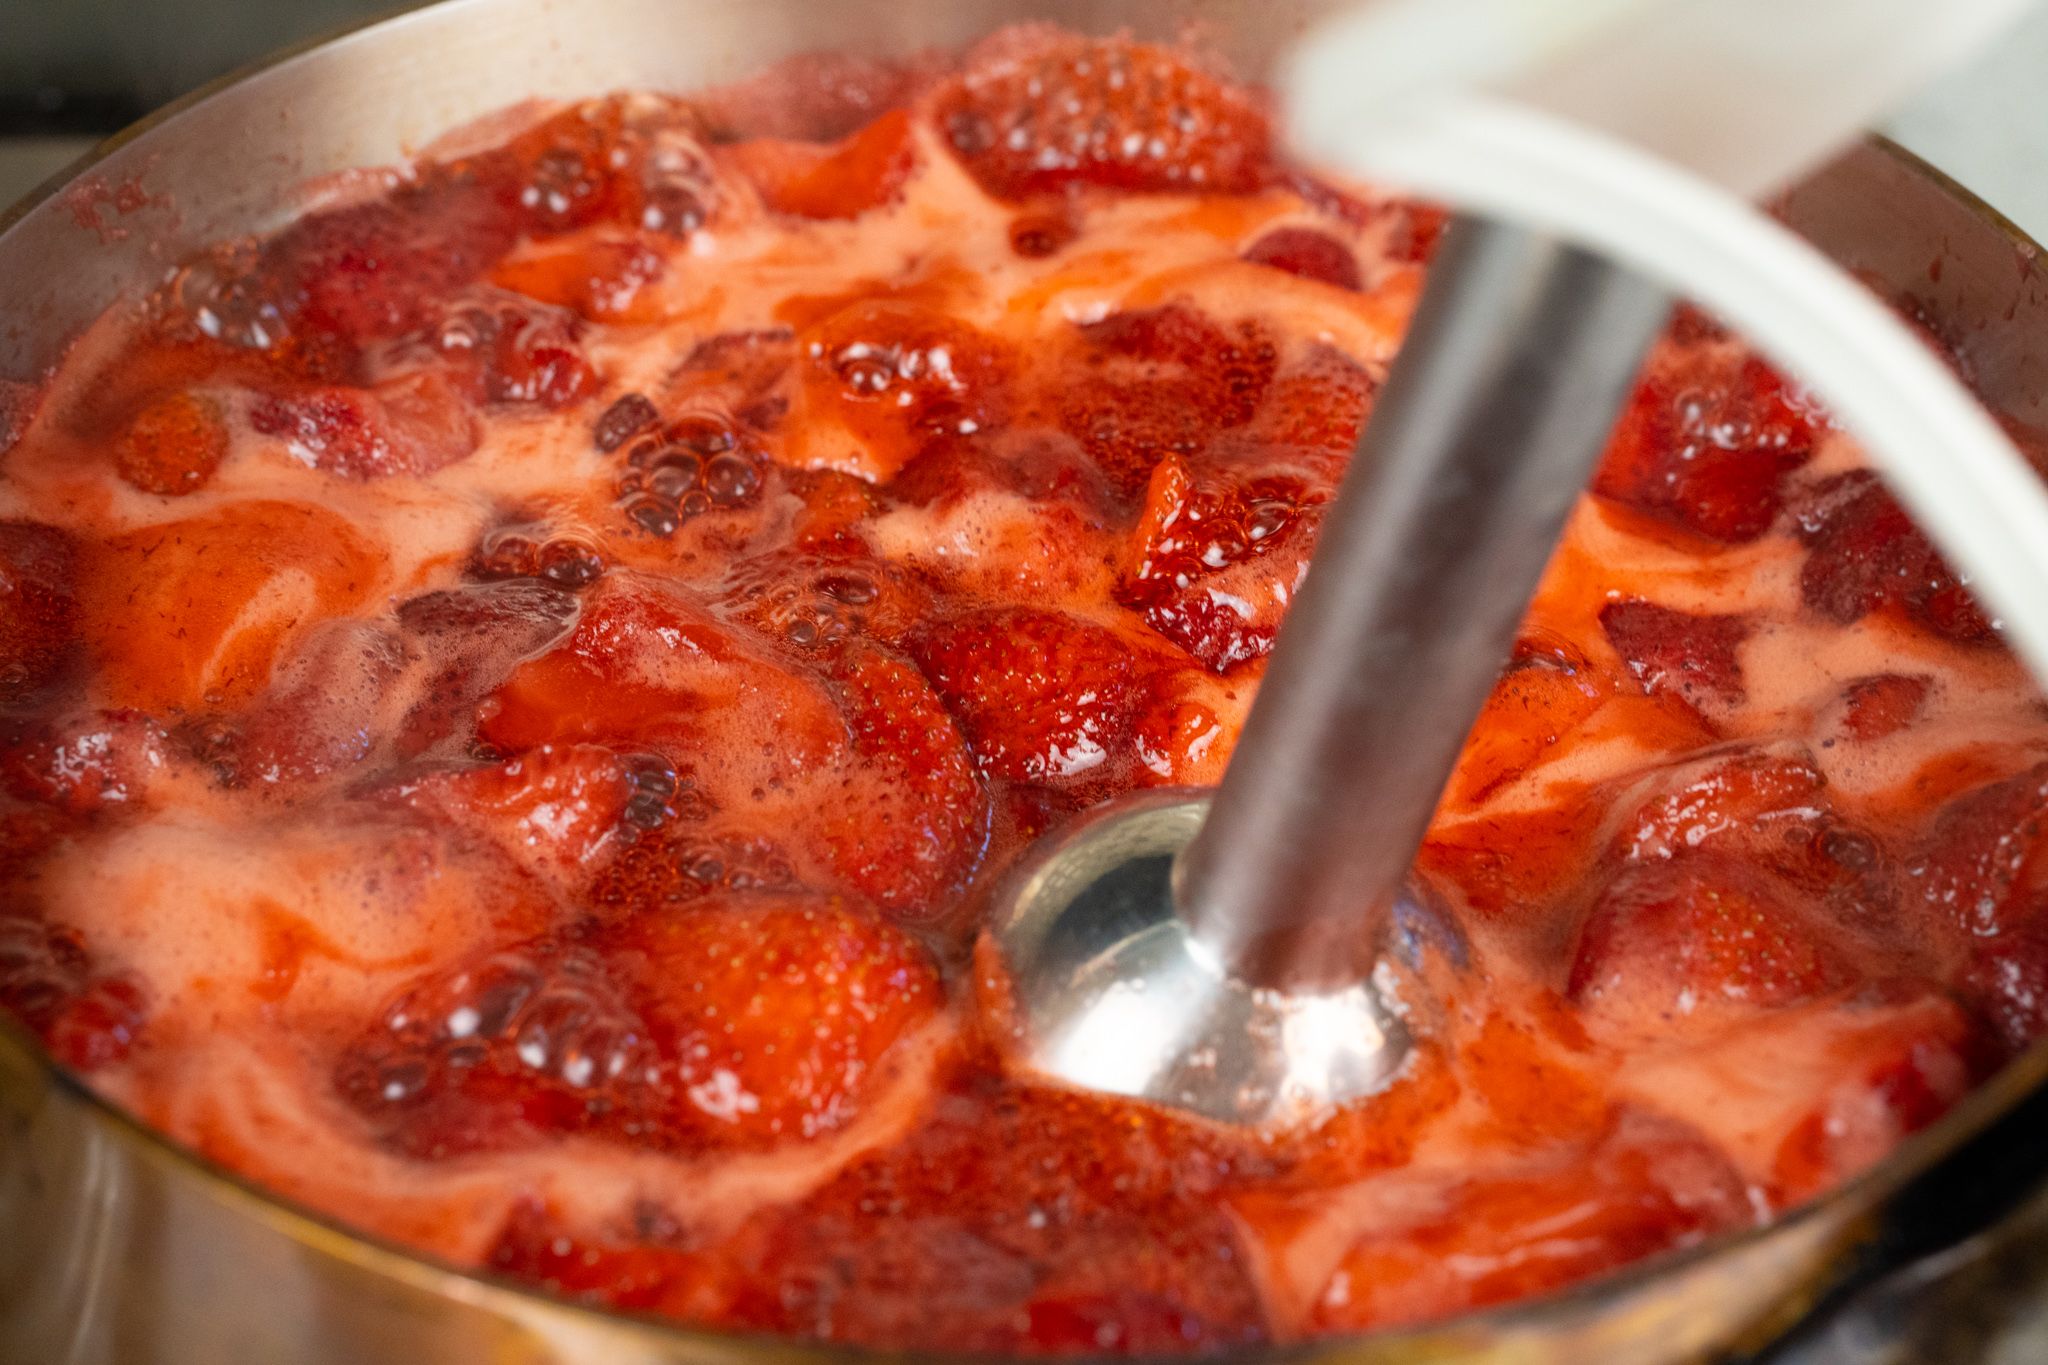
- Once the strawberries are nice and soft (about 20 – 30 minutes), use an immersion blender to pulse the strawberries until they reach the desired texture; I like mine with some chunks of fruit remaining. If you don’t have an immersion blender, a hand masher also works well.
- Return to a rolling simmer and cook an additional 30 minutes unit the strawberries have reduced.
- In a small bowl, mix together the 2 tablespoons of pectin with the remaining ¾ cup sugar; mix this well.
- Using a whisk, add in the sugar/pectin mixture with the strawberries and bring back up to a slow boil. Continue to cook for about 5-10 minutes; remove from heat.
- Transfer preserves to your sterilized Mason jars, leaving about ½ at the top.
- Firmly screw on the lids and add jars to a large pot with boiling water; boil for 10 minutes. After 10 minutes, carefully remove jars from pot and allow to cool. The tops of the jars should seal and the center of the lids should not pop out when you push on them. When properly sealed, the preserves should last a full year, in a cool dark place.